After looking at your shot, somehow you don’t get the sharpness that you desire. Then you start to feel disappoint with it. But don’t worry because today I would like to share with you how to sharpen your photo with CS5. Of course there are several techniques to do it, but the technique that I’m going to share is simple and only take you several minutes.
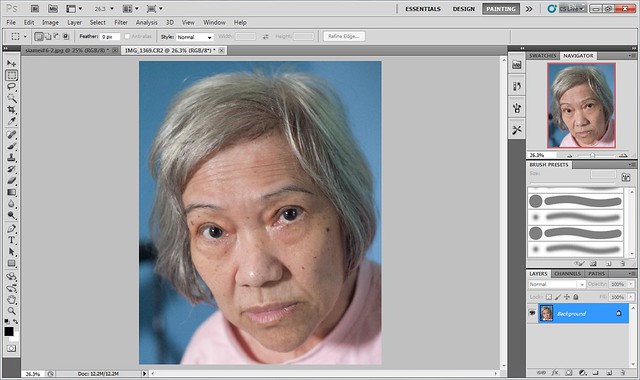
1. Open the photo that you would like to sharpen.
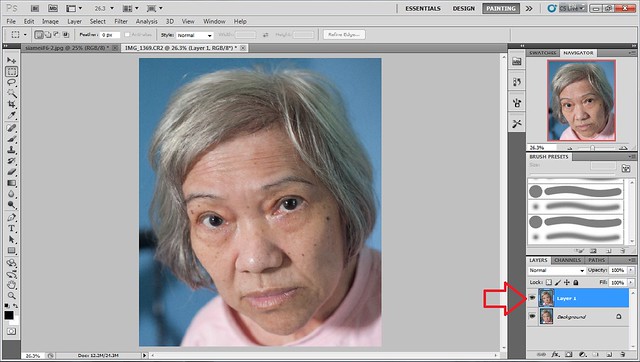
2. Press CTRL J to duplicate the photo.
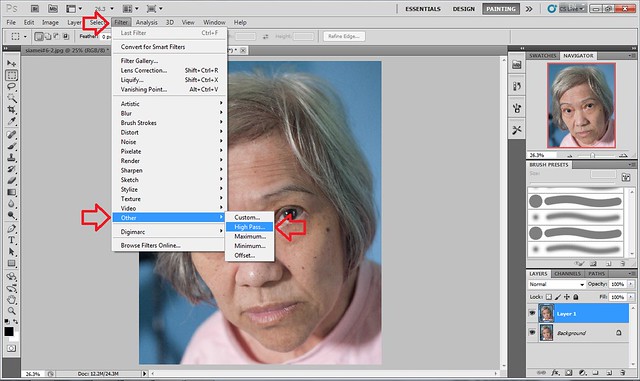
3. Go to FILTER -> OTHER -> select HIGH PASS
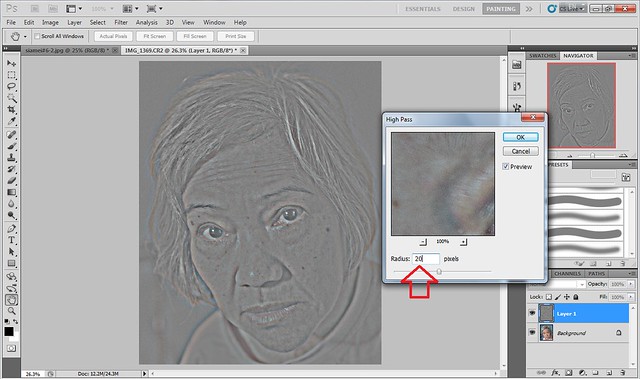
4. You can choose RADIUS that your prefer. However as for me I have choosen 20 PIXELS.
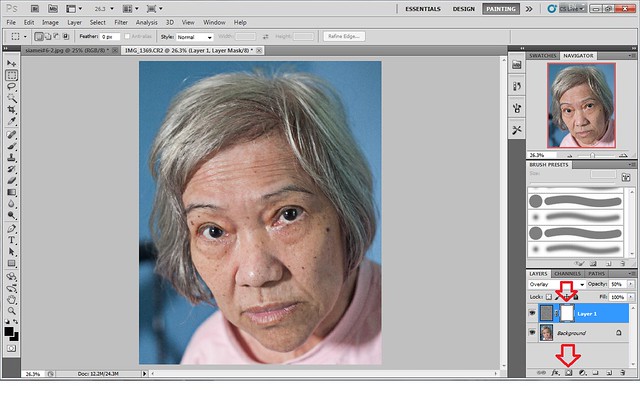
5. Go to LAYER, select NORMAL and click OVERLAY.

6. The photo might be slightly oversharpen. But it's not a problem as we can reduce the sharpness by adjusting the OPACITY. I have selected 50% OPACITY.

7. The photo is totally sharpen. However there are certain area that you doesn't want to sharpen. You can do it by selecting ADD A MASK and you'll see LAYER 1 box there.
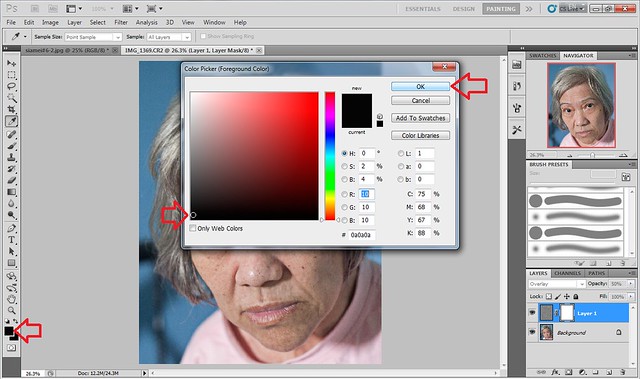
8. Go to SET FOREGROUND COLOR to black and click OK.
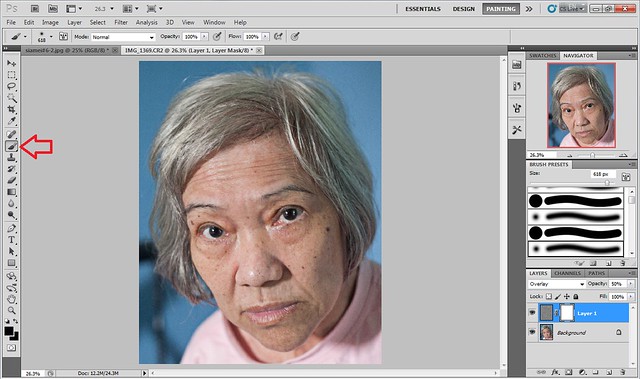
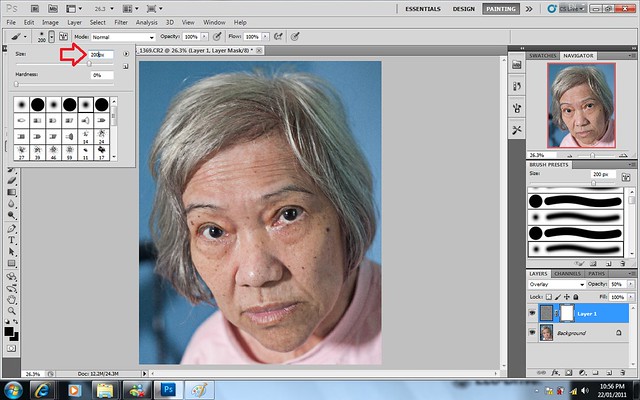
9. Select BRUSH and choose your prefer SIZE. As for me, I have chosen 200. Then you start to brush all the area that you doesn't want to sharpen. For me, I have decide not to sharpen the skin tone, therefore I have brush it accordingly.
10. Once everything has been complete, go to BACKGROUND, right click and select FLATTEN IMAGE.
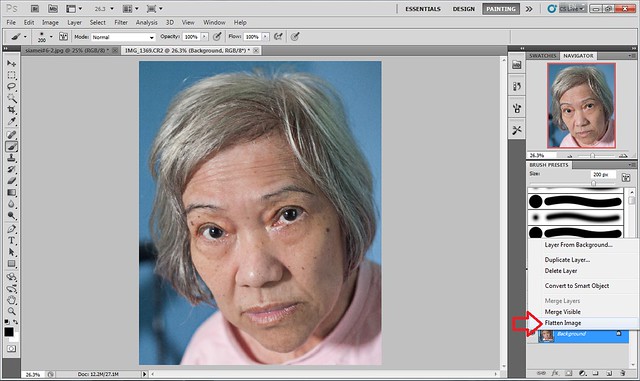
Here you go:
Before (left) After (right)
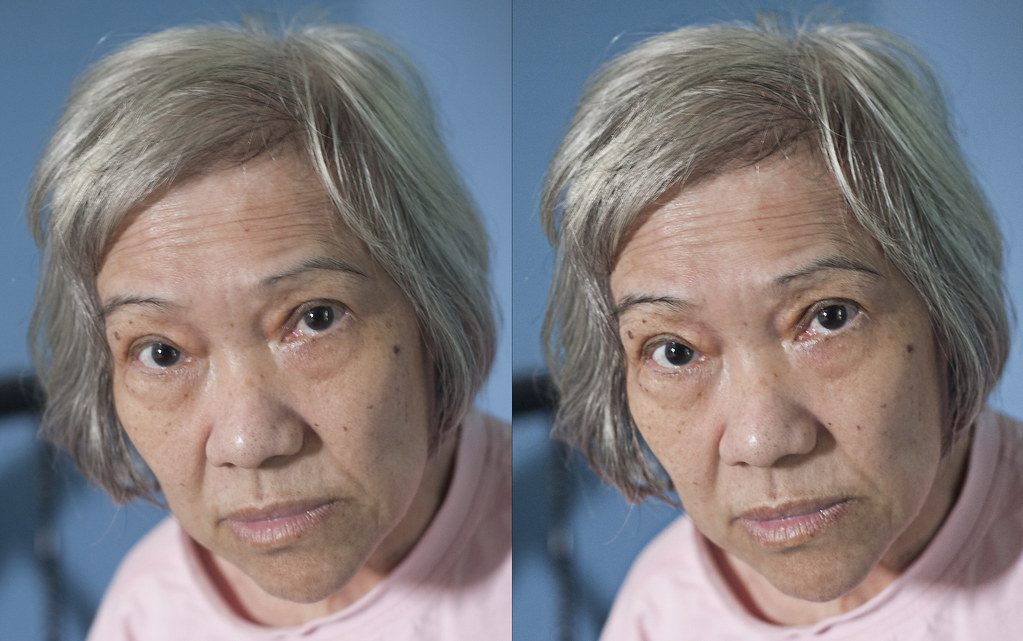
It's easy isn't it?
1. Open the photo that you would like to sharpen.
2. Press CTRL J to duplicate the photo.
3. Go to FILTER -> OTHER -> select HIGH PASS
4. You can choose RADIUS that your prefer. However as for me I have choosen 20 PIXELS.
5. Go to LAYER, select NORMAL and click OVERLAY.
6. The photo might be slightly oversharpen. But it's not a problem as we can reduce the sharpness by adjusting the OPACITY. I have selected 50% OPACITY.
7. The photo is totally sharpen. However there are certain area that you doesn't want to sharpen. You can do it by selecting ADD A MASK and you'll see LAYER 1 box there.
8. Go to SET FOREGROUND COLOR to black and click OK.
9. Select BRUSH and choose your prefer SIZE. As for me, I have chosen 200. Then you start to brush all the area that you doesn't want to sharpen. For me, I have decide not to sharpen the skin tone, therefore I have brush it accordingly.
10. Once everything has been complete, go to BACKGROUND, right click and select FLATTEN IMAGE.
Here you go:
Before (left) After (right)
It's easy isn't it?